skip to main |
skip to sidebar
"The days are long, but the years are short..."
Gretchen Rubin
I don't think there is a better quote that describes parenting, or life for that matter, than this quote. Each Halloween I try to recall my children's costumes worn each year since they were born. My kids are now 14, 11 and 8 so it was getting a little difficult to recall. And I found myself feeling a bit sad not being able to remember these joyful little moments.
When I stumbled upon these adorable cards last year by DoubleBravo, I was thrilled! What a brilliant idea! I immediately ordered three of them. Of course, they then sat in my Halloween decor up in the attic for a whole year until I happily discovered them again. So, I sat down with my kids and luckily we were able to remember each and every costume.
You may be thinking "why doesn't she just look back at photos to recall these past halloweens?" One could do that if one were organized and had placed photos in albums like a good mommy. By the time we had our third child, Lily, well, you know how that goes (notice there are no photos of Lily in her costume the first few years; she'll surely be in therapy for that). I did manage to scrape up a few old (and recent) photos to reminisce.
while my kids may roll their eyes at me for compiling such a list, I think it will be a different reaction in 20 years when they look upon these clever cards and just maybe i'll get a "thanks, mom!"
Enjoy these little moments, for they are treasures too easily forgotten...
Happy Halloween!

Yesterday I showed my daughter's "cute" halloween favor here.
Today is the "creepy" version for my 11-yr old son that he handed out to his class last year.
vampire blood bags (original inspiration here)
you'll need:
small brown kraft envelopes (found at Michael's)
black twine (found here)
vampire labels (found here)
candy blood bags (found here)
hole punch and/or awl
Punch a hole in the "hang" tag section of the label. Use an awl to make two holes for a "vampire bite." I used an awl instead of a hole punch for the "bite" to make it more realistic.
Place one bag o' blood in envelope. Wrap twine around several times and add tag.
So cute and creepy....perfect for 11-yr old boys!
Do you prefer cute or creepy halloween?
Now if I can just figure out what this year's favors are going to be...

I am well steeped into Halloween already and have been thinking about classroom favors for my children. My daughter is in third grade and I tend to do something a little "cuter" for her class. Although she and I both prefer things a little creepier.
I made these for her class last year. I saw the original idea in Better Homes and Gardens.
Here's what you'll need:
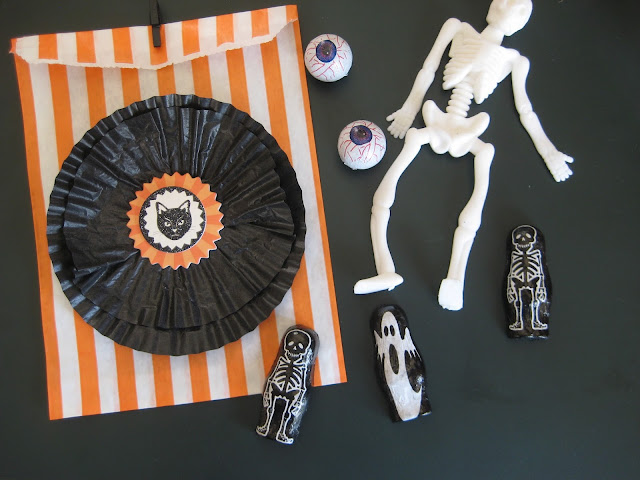
favor bags (found here)
glassine cupcake liners (found here)
halloween stickers (mine are last year's martha stewart collection)
mini black clothespins (found here)
adhesive roller
assorted halloween candies, trinkets, etc
Flatten out two cupcake liners of the same color.
Scrunch one of the liners to make it slightly smaller than the other liner.
Glue smaller liner on top of large liner. Add sticker to middle.
Glue cupcake liner to front of bag. Fill with assorted candy, treats and trinkets.
Fold over top of bag and keep closed with mini clothespin.
How cute and easy!! Tomorrow I will show you my creepy version for my son's class.

I took a break from cookie baking so that I could host my first ever craft camp for girls at my home last week. I had so much fun preparing the crafts and teaching the girls some new skills. My craft camp was inspired by dandee-designs. I love everything she does.
Just like dandee, I wanted to send each camper a cute, little reminder of camp the week before. I would have loved to receive this kind of postcard in the mail as a girl. Heck, I'd love to receive one now! Big thanks to my sis who did the design work on the cards!
I love these adorable friendship bracelet tattoos from Tattly. The girls and I were kindred crafters!
I can't wait to share with you all the crafts we did. So, check back next week for updates!

we celebrated lily's 8th birthday party with a simple "arts and crafts" theme this year.
lily helped me make the invitations. since it was an arts and crafts party, i wanted the invitations to be all handmade. we didn't want the traditional "roygbiv" color scheme so we chose pink, orange and green. we stamped little muslin bags and then made a cute flag banner with all the party details to go inside the bag. we then finished off the envelope with some cute washi tape.
when the guests arrived they started on their first craft: painting wooden necklaces
the necklaces were finished with a neon pink cord (sorry no photo)
(original craft inspiration here)
the second craft and my absolute fave!!!: fork dolls
i think i had more fun making these than the girls!
(original craft inspiration here)
aren't they just sweet?
we then moved onto floral monograms
(original craft inspiration here)
and the last craft was edible!
the girls created their own masterpieces with edible markers on iced sugar cookies
(original inspiration here)
happy birthday lily!
if you'd like to see lily's 7th woodland-inspired birthday party, click here


